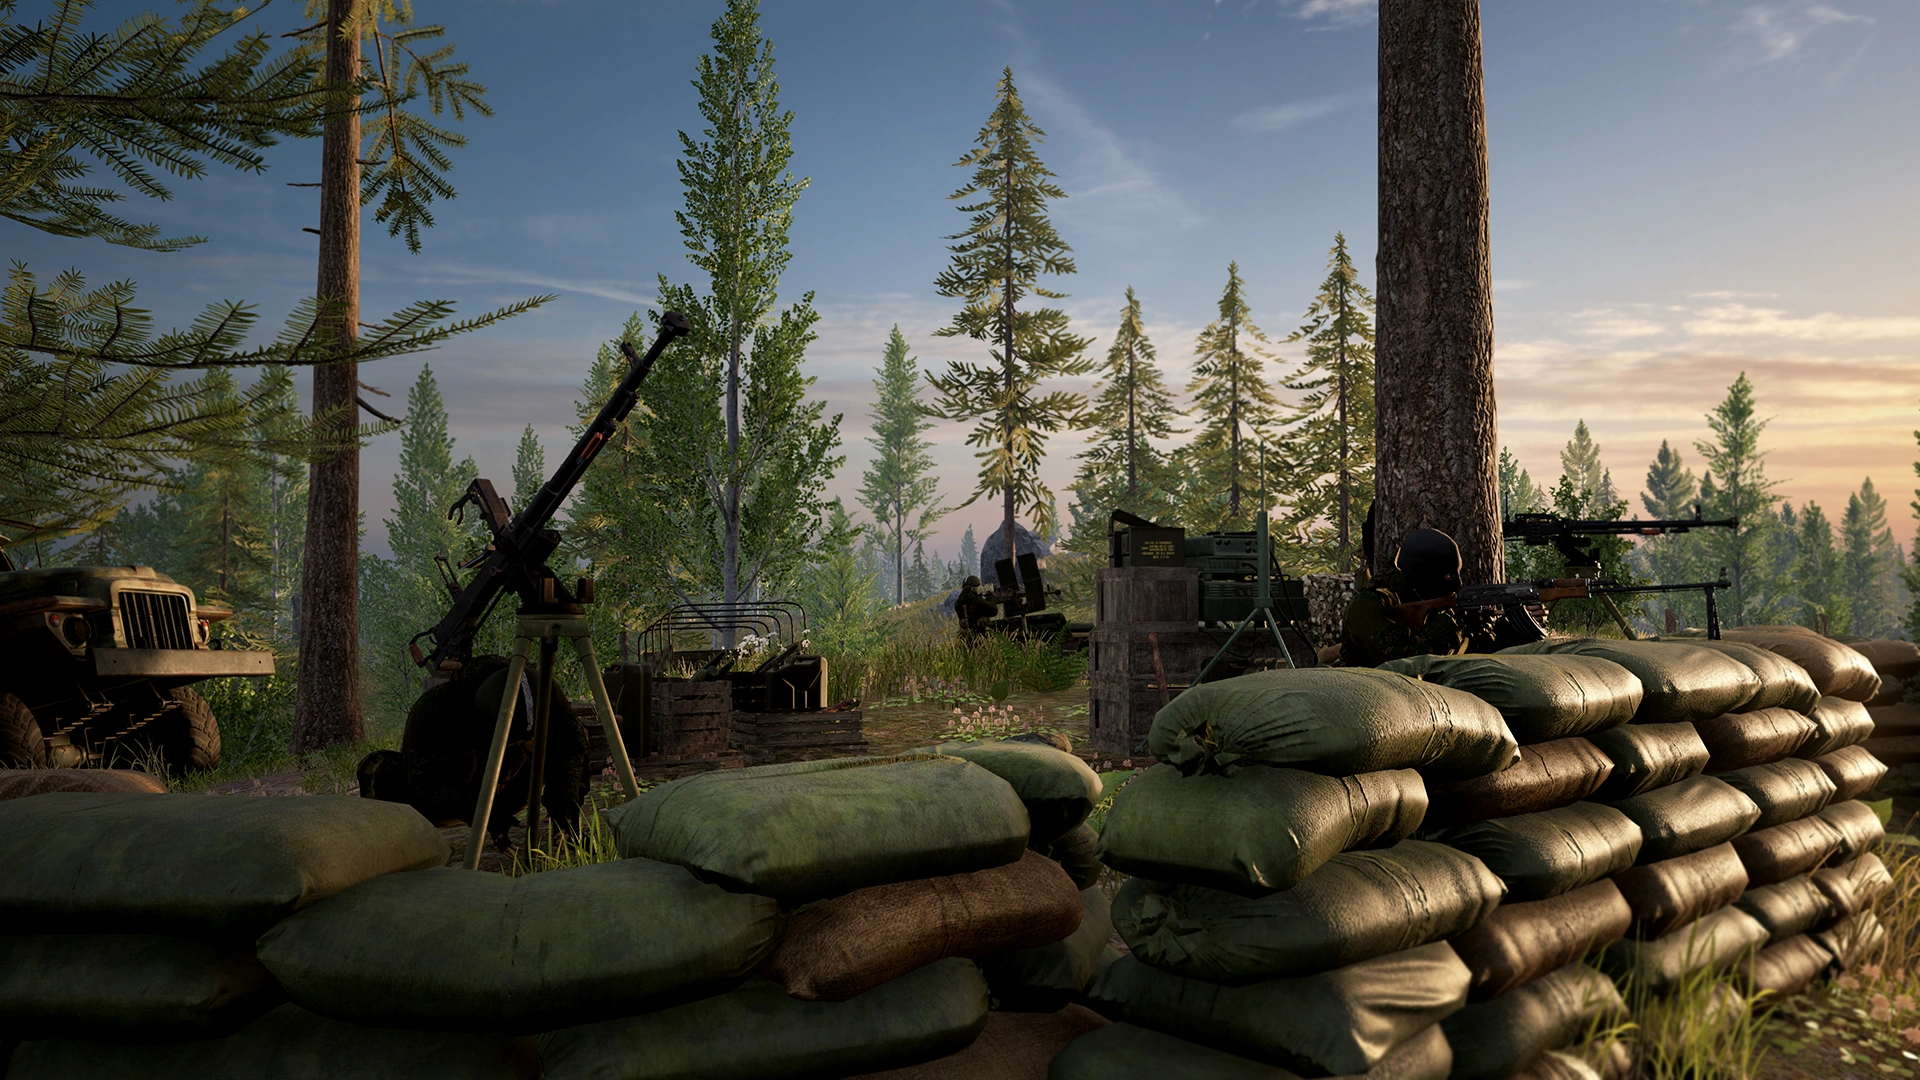
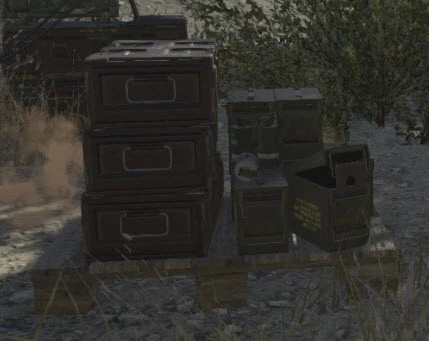
An Irregular Militia forward operating base (F.O.B.) with various deployed emplacements.
Deployables are structures that Squad Leaders and FireTeam Leads can deploy within the 150-meter build radius of a Forward Operating Base. Once deployed, these structures require other players to construct using the Entrenching tool. Deployables allow players to change the tactical situation anywhere on the map. Forward Operating Bases are designed to support your team in achieving the gameplay objectives by providing Spawn points, resupply in the form of ammo crates and repair stations, cover in the form of fortifications, as well mortars, heavy machine guns, and anti-tank guided missiles, in the form of emplacements.
Gameplay[ | ]
Building Deployables[ | ]
Once a Radio Hub has been placed and supplied with construction points from a Logistics vehicle or helicopter, deployable assets can be built within 150 meters of where the Radio was placed. The Squad Leader or Fireteam Lead chooses deployables from the Deployables Menu by holding down the default T. Once a deployable is chosen, it can be rotated with the arrow keys.
Refund mechanic[ | ]
Since Version 2.0, if a deployable was dug down before fully built, it refunds 80% construction points it costs. This mechanic is intended to reduce the penalty for accidental bad placement of the deployables.
FOB widget[ | ]
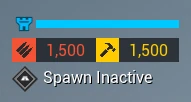
After a Radio Hub is placed, the FOB widget appears. Ammunition and supplies begin at 0. Logistics Vehicles or helicopters will be needed to provide additional resources for the Forward Operating Base. The progress bar displays the health status of the Radio Hub. The ammo counter, number to the left, shows the available ammo supply at this FOB.
The construction supply, the number to the right, shows the supply balance you have available for building objects.
The icon below the ammunition and supply counters displays the status of the Forward Operating Base as a spawn location (designated Inactive or Active).
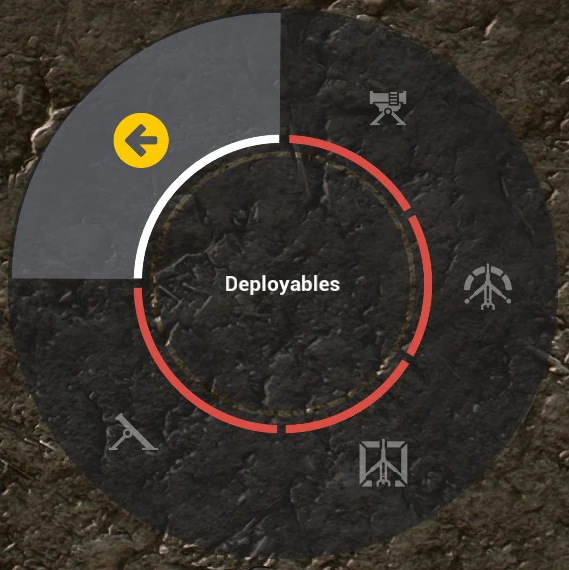
Radial Menu[ | ]
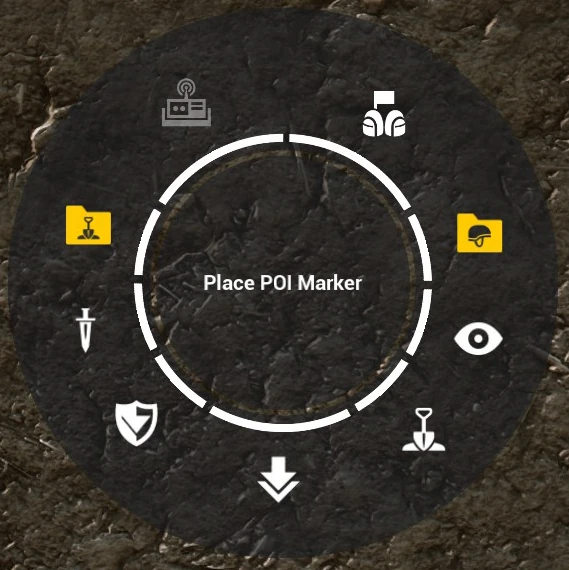 |
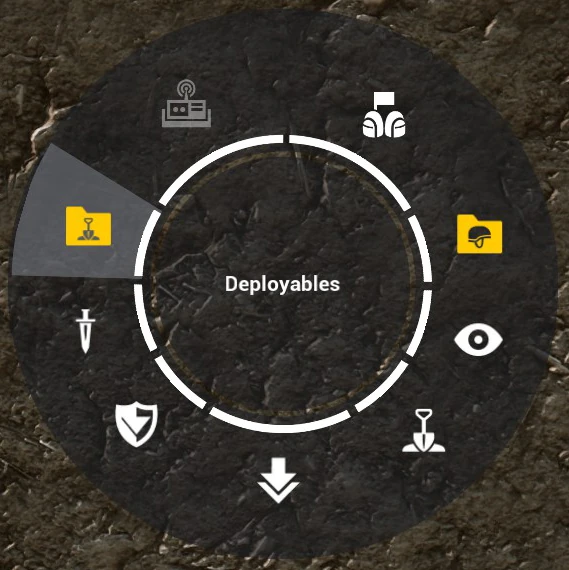
This is the first Radial Menu when you hold down the key T. Only Squad Leader has this menu. Be aware if the SL is not holding the Squad Leader kit, he will not see the option for the |
 |
When selecting the |
 |
The |
 |
With the |
 |
With the |
 |
And with the |
Placement[ | ]
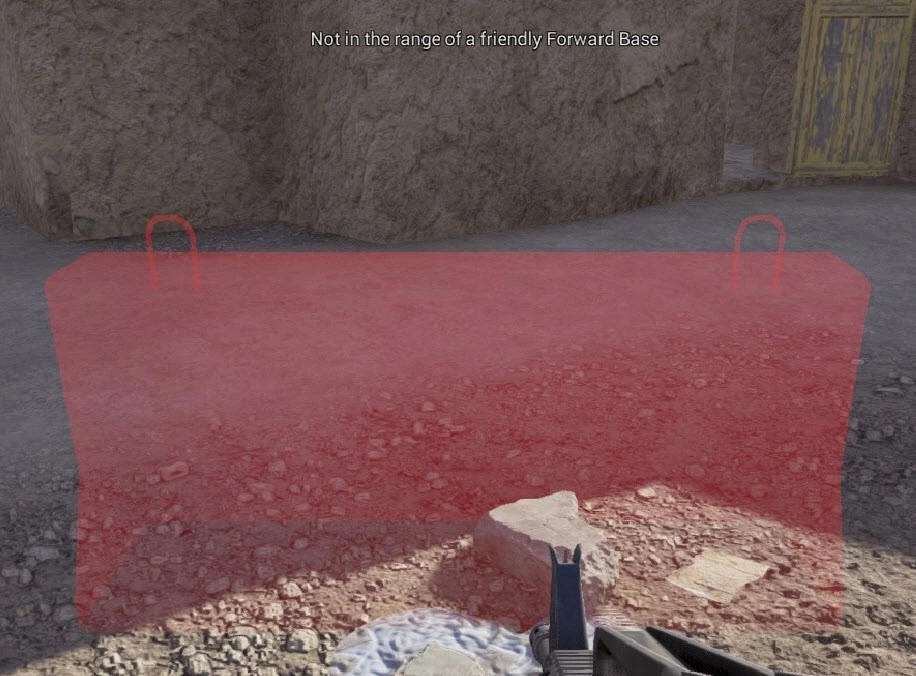
With the Radio Hub deployed and with enough supplies accumulated, the Squad Leader can build deployable assets within a 150m-radius of the Radio Hub. Open up the deployables menu and choose the object with the mouse and click the Left-Mouse-Button to select it. You will now see a red or green shape of the object. Red means you cannot place it at the moment, green means you can place it. Move around with this shape to choose a suitable location. Click the Left-Mouse-Button to set down the object when it is shown in green, click the Right-Mouse-Button to cancel the build.
|
Tips:
|
When the Squad Leader is able to place the green shape, construction stakes appear at its location and team members need to start the construction by using their shovels. Stand near the stakes and aim at them, then hold the Left-Mouse-Button to start building the objects. Note that you can only shovel if you are next to a constructible object. Once you start shoveling, a progress bar will appear showing the progress of the object. The object will also change stages as progress is made. Shoveling will also automatically stop after the object is finished. Except for the Radio Hub, all objects need to be shoveled to be fully constructed. The more people that shovel, the quicker the construction is finished.
A few objects can be stacked on top of themselves. This way, for example, you can build a tall wall of Sandbags. You can also build objects on top of houses and other locations. The construction of deployables goes through three stages. You physically see the progress of these three stages in the game – there exists no progress bar.
Stages[ | ]
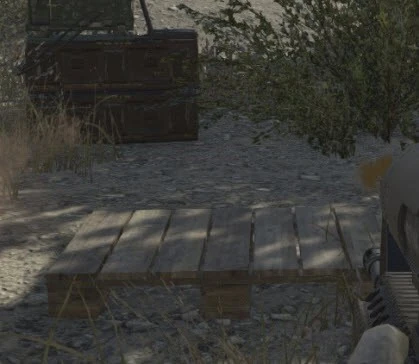
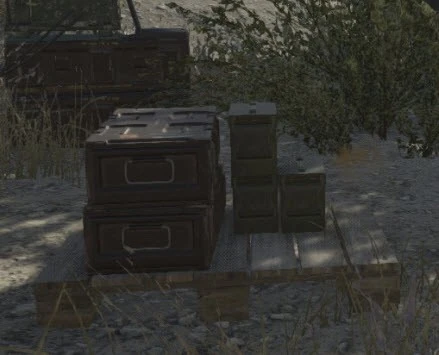
Building of emplacements happens in 3 stages:
 |
 |
 |
| Stage 1: Construction stakes/foundation put down by the Squad Leader, the object does not yet exist | Stage 2: First stage of construction completed, the object is half finished | Stage 3: At the final stage of construction the object is completed |
Using an emplacement such as an ammunition box requires it to be in its final stage of completion; otherwise, it won't be usable.
Destroying Deployables[ | ]
You can take down your own or enemy deployables with your shovel and hold down the RMB Right-Mouse-Button. It will deconstruct the object until it disappears. You can also use explosives, rockets, grenades, and high-caliber vehicle weapons with varying effectiveness against deployables.
Destroying deployables happens in the same three stages as construction in reverse order. That means that reaching the second stage while destroying an object renders it unusable until it's reconstructed to the final stage again. That is especially useful when deconstructing enemy spawns, as you don't need to worry about enemies spawning on you while you're destroying their spawn. To destroy a deployable completely you have to keep digging until the lowest stage (foundations) is gone, too.
Destroying the Radio Hub of Forward Operating Base will instantly destroy all tech structures (HABs, ammo crates, vehicle repair stations) within its radius, and emplacements (TOW launchers, MG bunkers) placed within a radio hub's build vicinity will be destroyed as well. Fortifications such as sandbags and HESCO blocks will remain.
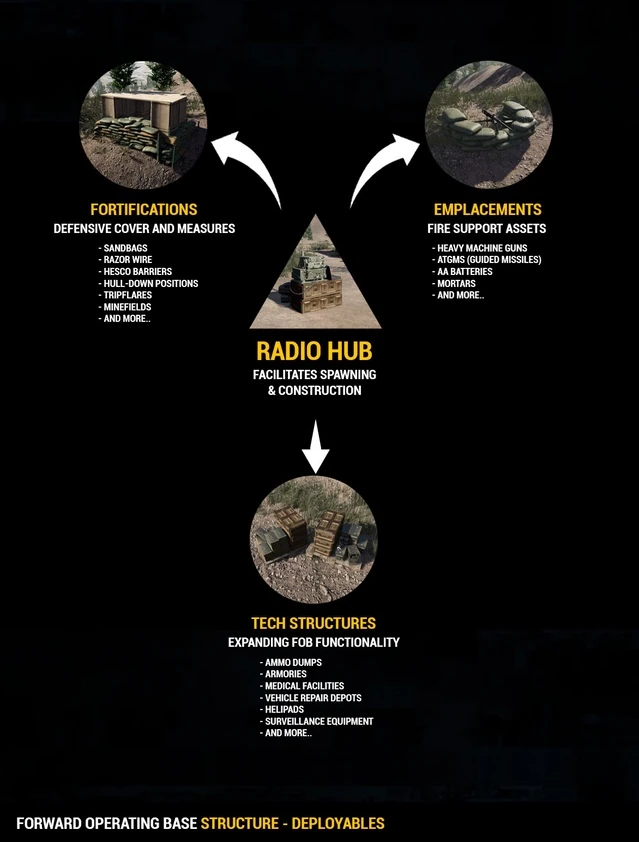
Deployable Types[ | ]
| Icon | Type | Description |
|---|---|---|
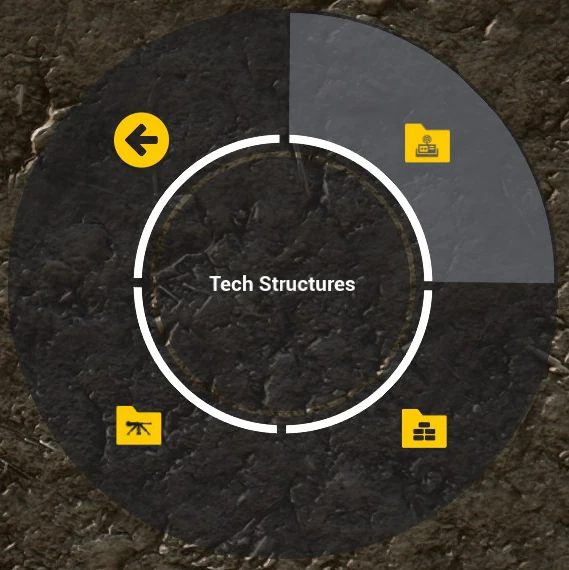
| Tech Structures | These are the structures essential to the proper use of the FOB. These Deployables will disappear if the Radio is destroyed. | |
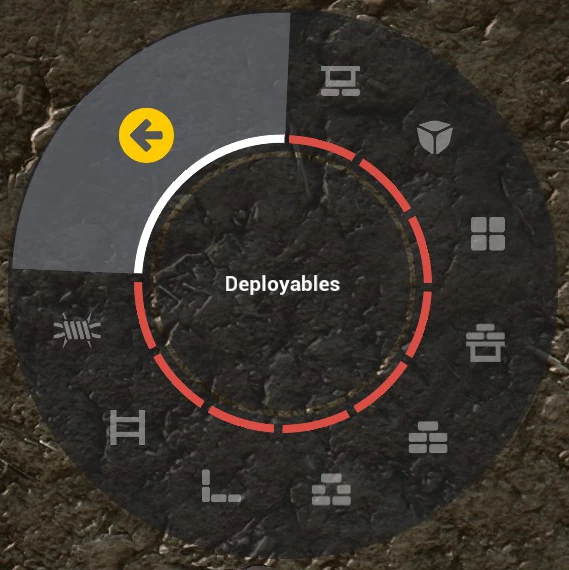
| Fortifications | These are structures that are used to provide shelter and cover from enemy fire, as well as access to higher areas like roofs or seal areas. These Deployables will remain even if the Radio is destroyed. | |
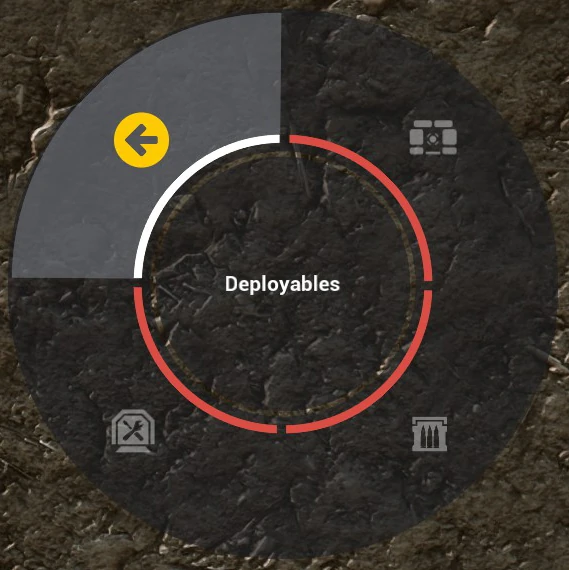
| Emplacements | These are the stationary weapons that can provide fire support for the team. These Deployables can be used by both friendly and enemy infantry, and they will disappear if the Radio is destroyed. |
List of Deployable Objects and Costs[ | ]
- Before you can create any Deployables, you need to place a
 Radio Hub and add sufficient supplies, such as construction points to build, and ammunition points to provide ammunition for Emplacements and Ammo Crate.
 - Emplacements will start empty and unloaded upon finishing construction. This means that, upon entering, the player will start the reload cycle provided there is enough ammunition point from the FOB to draw upon.
- The FOB Limit denotes the placement restriction. The table below illustrates the count for the Combined Arms Unit Type faction setup (default). The Limit may vary depending on the Unit.
| Icon | Name | Type | Faction | FOB Limit | ||
|---|---|---|---|---|---|---|
| Spawn Bunker | Tech Structure | 500 | N/A | 1 | ||
| Repair Station | Tech Structure | 500 | N/A | 1 | ||
| Ammo Crate | Tech Structure | All Factions | 100 | N/A | None | |
| Spawn Bunker | Tech Structure | 100 | N/A | 1 | ||
| Spawn Bunker | Tech Structure | 100 | N/A | 2 | ||
| Repair Station | Tech Structure | 300 | N/A | 1 | ||
| Camouflage Wall | Tech Structure | 50 | N/A | None | ||
| Camouflage Lean-To | Tech Structure | 50 | N/A | None | ||
| Camouflage Canopy | Tech Structure | 100 | N/A | None | ||
| Hedgehog Tank Trap | Tech Structure | 20 | N/A | None | ||
| Icon | Name | Type | Faction | FOB Limit | ||
| HESCO Bunker | Fortification | 150 | N/A | 1 | ||
| HESCO Wall | Fortification | 150 | N/A | 1 | ||
| HESCO Block | Fortification | 50 | N/A | 1 | ||
| Observation Tower | Fortification | 600 | N/A | 4 | ||
| Indirect Fire-shelter | Fortification | 300 | N/A | 3 | ||
| Dirt-filled Oil Barrels | Fortification | 60 | N/A | None | ||
| Tire Fire | Fortification | 100 | N/A | 2 | ||
| Indirect Fire-shelter | Fortification | 300 | N/A | 3 | ||
| Sandbag Bunker | Fortification | 300 | N/A | 6 | ||
| Sandbag Bunker | Fortification | 300 | N/A | None | ||
| Wooden Trench Wall | Fortification | 50 | N/A | None | ||
| Observation Tower | Fortification | 300 | N/A | 4 | ||
| Hull-down Position | Fortification | 200 | N/A | 2 | ||
| Dirt-Filled Ammo Boxes - High Wall | Fortification | 50 | N/A | None | ||
| Dirt-Filled Ammo Boxes - Low Wall | Fortification | 50 | N/A | None | ||
| Dirt-Filled Ammo Boxes - Firing Ports Wall | Fortification | 50 | N/A | None | ||
| Sandbags Line | Fortification | 25 | N/A | None | ||
| Sandbags Pillbox | Fortification | 25 | N/A | None | ||
| Sandbags Crescent | Fortification | 25 | N/A | None | ||
| Razor Wire | Fortification | 15 | N/A | None | ||
| Sandbags Line | Fortification | 10 | N/A | None | ||
| Sandbags Pillbox | Fortification | 10 | N/A | None | ||
| Sandbags Crescent | Fortification | 10 | N/A | None | ||
| Razor Wire | Fortification | 10 | N/A | None | ||
| Ladder | Fortification | All Factions | 25 | N/A | 5 | |
| Icon | Name | Type | Faction | FOB Limit | ||
| BGM-71 TOW ATGM | Emplacement | 600 | 500 | 1 | ||
| M2A1 HMG Tripod | Emplacement | 200 | 50 | 2 | ||
| M2A1 HMG Bunker | Emplacement | 350 | 50 | 2 | ||
| L16A2 Mortar | Emplacement | 300 | 25 | 2 | ||
| M252 Mortar | Emplacement | 300 | 25 | 2 | ||
| HJ-8L ATGM | Emplacement | 600 | 500 | 1 | ||
| QJZ89 HMG Tripod | Emplacement | 200 | 50 | 2 | ||
| QJZ89 HMG Bunker | Emplacement | 350 | 50 | 2 | ||
| PP87 Mortar | Emplacement | 300 | 25 | 2 | ||
| 9M133 Kornet ATGM | Emplacement | 600 | 500 | 1 | ||
| NSV HMG Tripod | Emplacement | 200 | 50 | 2 | ||
| NSV HMG Bunker | Emplacement | 350 | 50 | 2 | ||
| 2B14 Podnos Mortar | Emplacement | 300 | 25 | 2 | ||
| SPG-9 Tripod | Emplacement | 600 | 500 | 3 | ||
| DShK HMG Tripod | Emplacement | 200 | 50 | 2 | ||
| DShK HMG (Shielded) | Emplacement | 350 | 50 | 2 | ||
| ZU-23-2 AAA | Emplacement | 300 | 25 | 2 | ||
| M1937 Mortar | Emplacement | 300 | 25 | 2 | ||
| Hell Cannon | Emplacement | 250 | 150 | 1 | ||
| ZiS-3 Field Gun | Emplacement | 250 | 50 | 2 | ||
| UB-32 Rocket Pod | Emplacement | 450 | 300 | 1 |
See Also[ | ]
| ||||||||||||||
| |||||||||||||||||